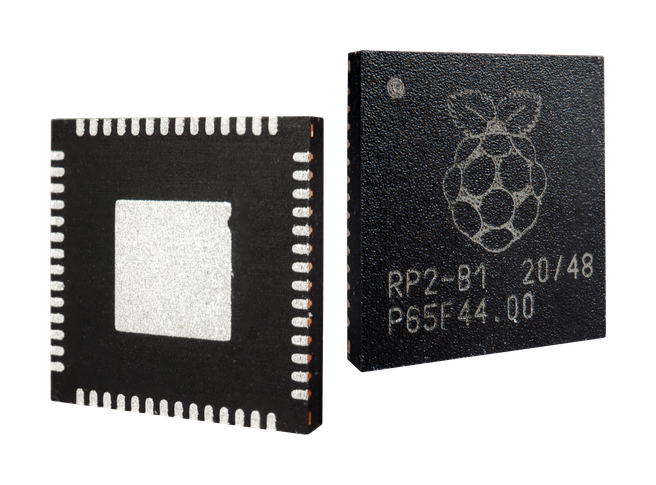
Raspberry Pi rp2040

The RP2040 is a dual core chip produced by Raspberry Pi that is based on ARM Cortex-M0+.
Peripheral Support
The following list indicates RP2040 peripherals currently supported in NuttX:
Peripheral |
Notes |
|---|---|
GPIO |
See Supported Boards documentation for available pins. |
UART |
GPIO 0 (UART0 TX) and GPIO 1 (UART0 RX) are often used for the console. |
I2C |
|
SPI |
|
DMAC |
|
PWM |
|
USB |
|
PIO |
RP2040 Programmable I/O |
IRQs |
|
DMA |
|
Clock Output |
|
ws2812 |
Smart pixels (e.g. Neopixel) |
Flash ROM Boot |
|
SRAM Boot |
If Pico SDK is available a nuttx.uf2 file will be created |
BMP180 |
Requires I2C0 |
INA219 |
Requires I2C0 |
The Pico Display Pack (ST7789 LCD) and Pico Audio Pack (PCM5100A I2S DAC) are also available.
There is currently no direct user mode access to these RP2040 hardware features:
SPI Slave Mode
SSI
RTC
Timers
Additionally, some supported features are:
Persistent flash filesystem in unused flash ROM
WiFi wireless communication (for capable boards such as the Pico W)
Installation
Download the Raspberry Pi Pico SDK:
$ git clone -b 2.2.0 --recurse-submodules https://github.com/raspberrypi/pico-sdk.git
Download and install
picotoolNote
If not found at build time, this tool will also be automatically compiled from the SDK sources. Manually downloading or compiling it is preferred, though.
Instructions can be found here: https://github.com/raspberrypi/picotool
If you are on Arch Linux, you can also install
picotoolthrough the AUR:$ yay -S picotool
Set
PICO_SDK_PATHenvironment variable to point to the cloned SDK:$ export PICO_SDK_PATH=<absolute_path_to_pico-sdk_directory>
You will have to do this every time you restart the terminal where you are building NuttX, so it might be best to include this command in your
bashrcso NuttX’s build system always knows where to find the SDK. You may also want to look into tools like direnv.Download NuttX and NuttX applications. These must both be contained in the same directory:
$ git clone https://github.com/apache/nuttx.git nuttx
$ git clone https://github.com/apache/nuttx-apps.git apps
Now you have all of the required dependencies for building NuttX for the RP2040.
Building NuttX
Change to the NuttX directory:
$ cd nuttx
Select a configuration. The available configurations can be listed with the command:
$ ./tools/configure.sh -L
The one you choose will be dependent on the board you want to build for, like
raspberrypi-pico:usbnshto use theusbnshconfiguration for the Raspberry Pi Pico.Load the selected configuration:
$ make distclean
$ ./tools/configure.sh <selected_configuration>
Modify the configuration as needed (optional):
$ make menuconfig
Build NuttX:
$ make
The output of the build process will be a file called nuttx.uf2, which you
are able to flash to the RP2040.
Programming
Programming using BOOTSEL
Connect the board to the USB port of your host computer while pressing down the BOOTSEL button.
Note
Some boards call it a different name, and some boards use pins that need to be jumpered instead of buttons. Consult the documentation for your particular board.
Note
If your board comes with a BOOTSEL and a RESET button, you might find it easier to hold down the BOOTSEL button and then press RESET, all while the board is still plugged in via USB. This will trigger the boot mode without having to constantly unplug and plug in the USB cable.
The board should be detected as USB Mass Storage Device, which you can mount in your file explorer just like a USB drive.
Then copy nuttx.uf2 onto the device. It should reboot itself into NuttX once
the UF2 file is done copying over!
Programming using SDB
Most (but not all) RP2040 boards provide a serial (SDB) debug port. The “nuttx” ELF file can be uploaded with an appropriate SDB programmer module and companion software.
Running NuttX
The usbnsh configuration that most supported boards provide allows console
access by USB CDC/ACM serial device. The console is available by using a
terminal software on your host computer with the device plugged in. Some
options are:
PuTTY
Minicom
Picocom
Many configurations may also provide access to the console via UART0. To access
this console from your host computer, GPIO 0 and 1 pins on your board must be
connected to a USB-serial converter
(and typically the GND pin as well), which is plugged into your computer. You
can then use your terminal software just like with usbnsh.
Note
Most configurations will run the console at 115200 baud.
Supported Boards
License exceptions
The following files are originated from the files in Pico SDK. So, the files are licensed under 3-Clause BSD same as Pico SDK.
arch/arm/src/rp2040/rp2040_clock.carch/arm/src/rp2040/rp2040_pll.carch/arm/src/rp2040/rp2040_xosc.cThese are created by referring the Pico SDK clock initialization.
arch/arm/src/rp2040/rp2040_pio.carch/arm/src/rp2040/rp2040_pio.harch/arm/src/rp2040/rp2040_pio_instructions.hThese provide the similar APIs to Pico SDK’s hardware_pio APIs.
arch/arm/src/rp2040/hardware/\*.hThese are generated from rp2040.svd originally provided in Pico SDK.